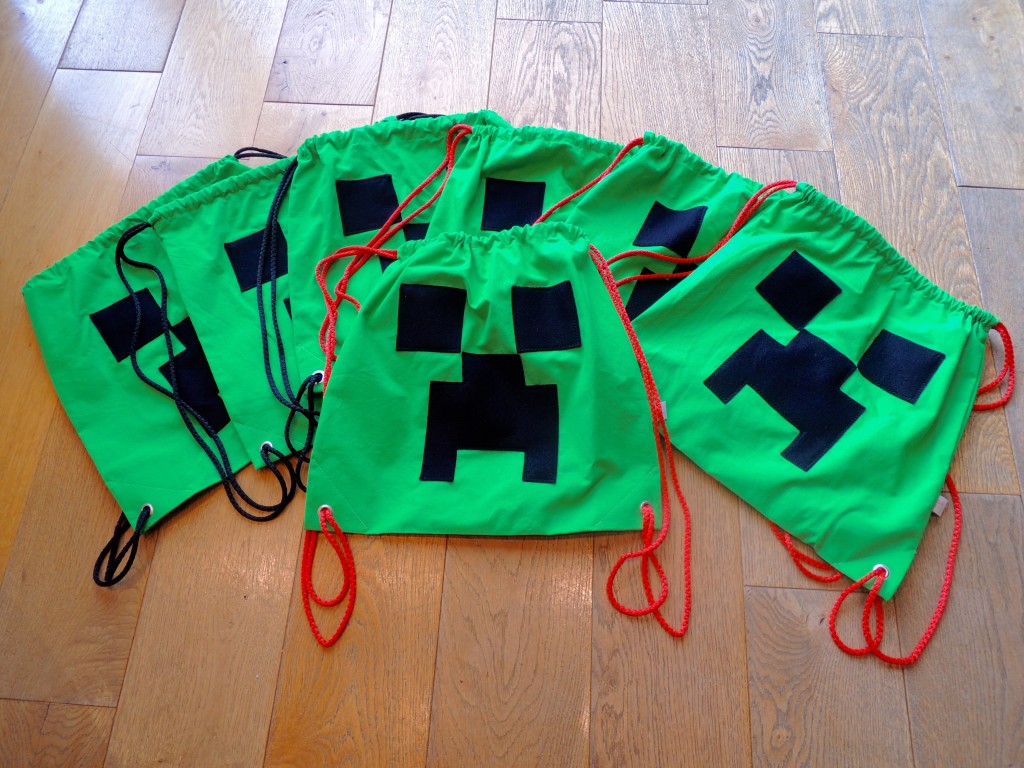
CREEPER GYM BACKPACKS
For our youngest 7th birthday party on the Minecraft theme, I thought that it might be funny to sew the kids some gym backpacks instead of the traditional goodie bag, bags they might use afterwards for school…

After rummaging a little bit through the Internet, I came across the tutorial by Merlanne (yes, again Merlanne, but I just love her blog 🙂 ) for the backpack she sewed for her son with the Minecraft guys on it. Well, what a cool idea was this and I started buying felt in different colours…
As time went by, I realized that it might get really, really short notice to still sew 12 of these backpacks with the little guys on them, not having yet started and not having the fabrics for the bags yet, nor the 48 meters of cord… I managed to sew a test bag and that was when the illumination came: just a creeper face would be so much easier and faster than sewing Steve and his colleagues and even funnier as a result!
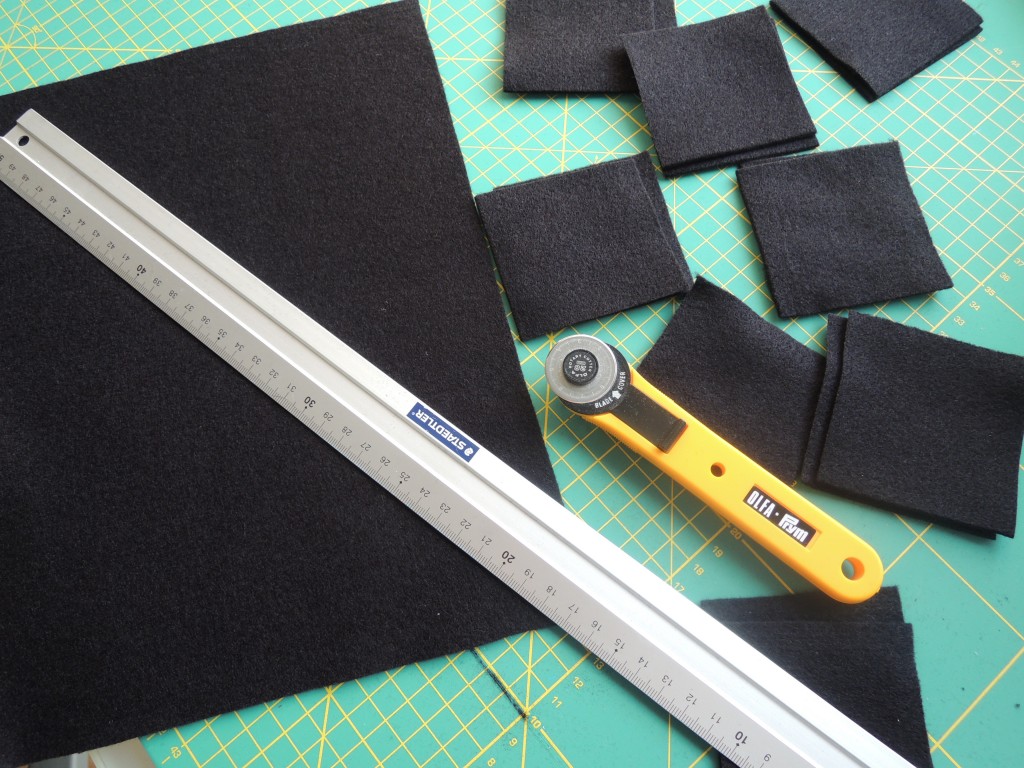
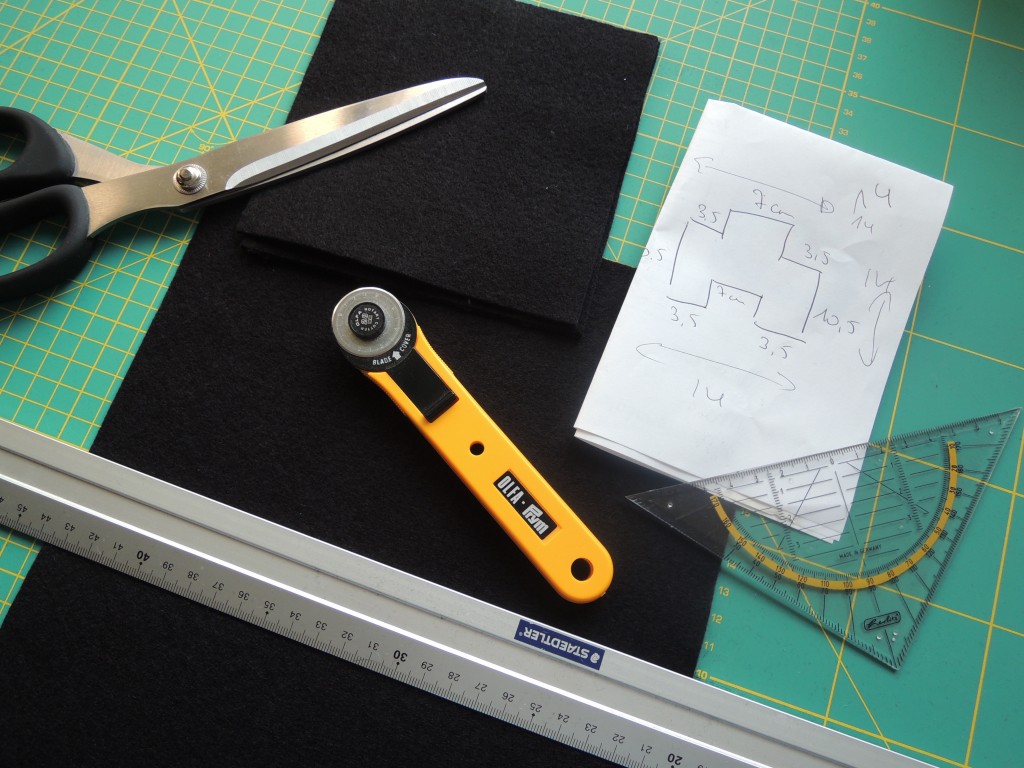
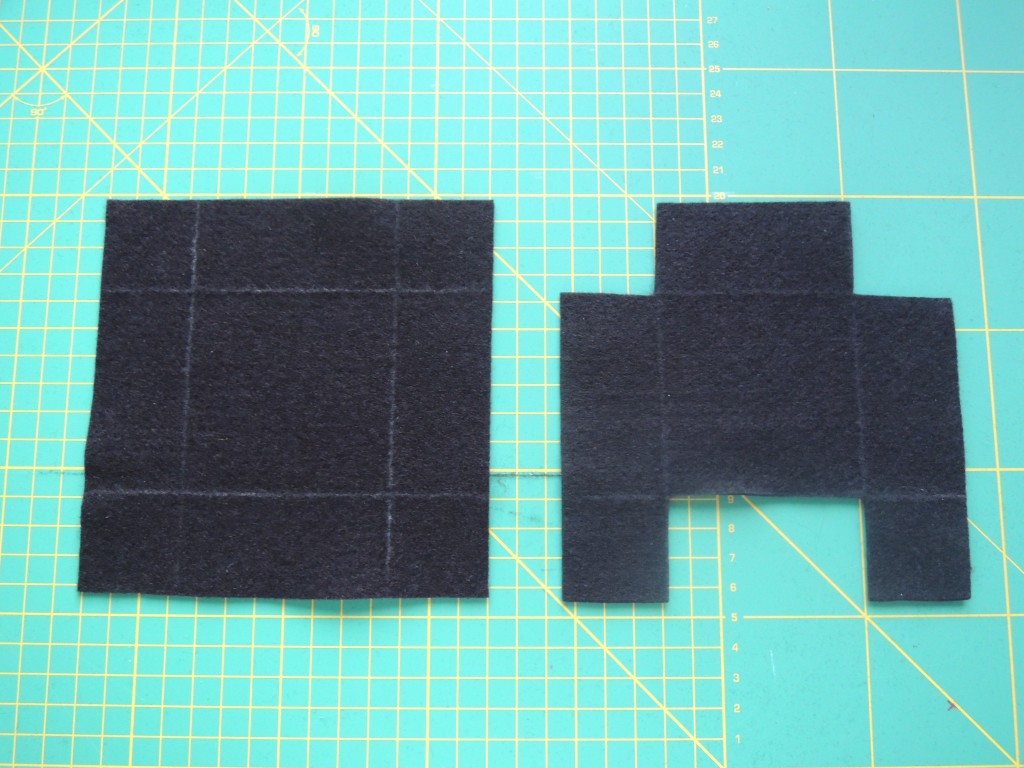
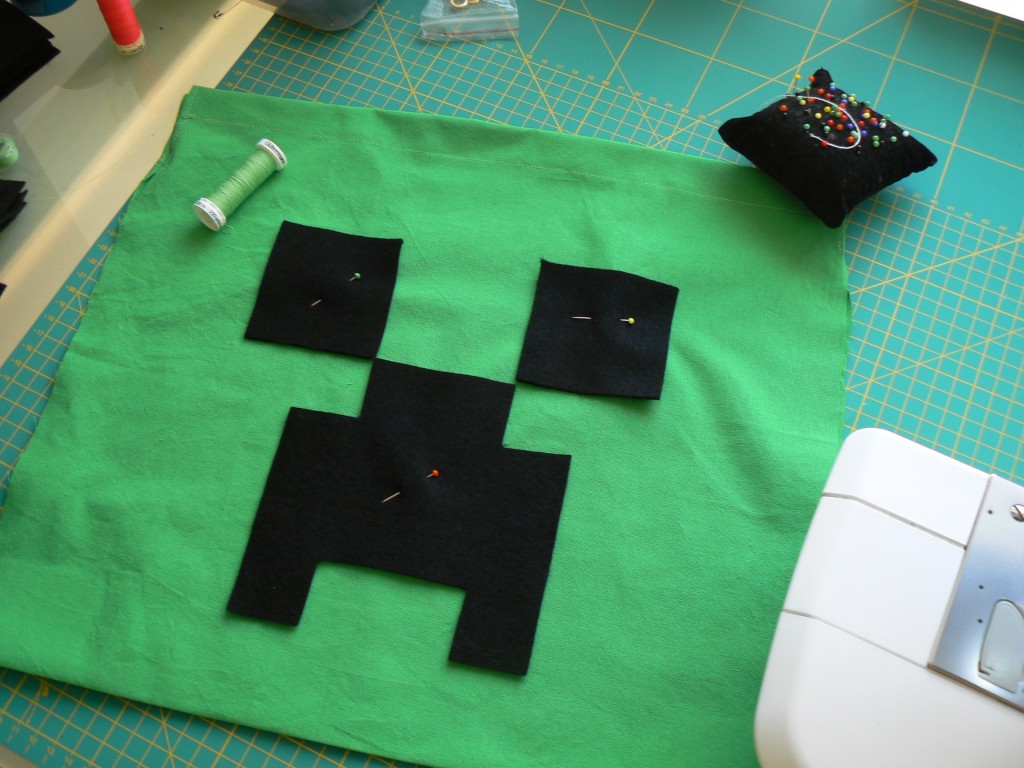
The next evenings were blocked to cut out the different parts in black felt for the Creeper faces: 2 squares for the eyes (7 x 7 cm) and a more elaborate square for nose and mouth. As you can see, I needed to write down my measures not to forget them! Using my cutting mat, ruler, some white chalk and cuter, made it so much easier to cut the whole in less time!
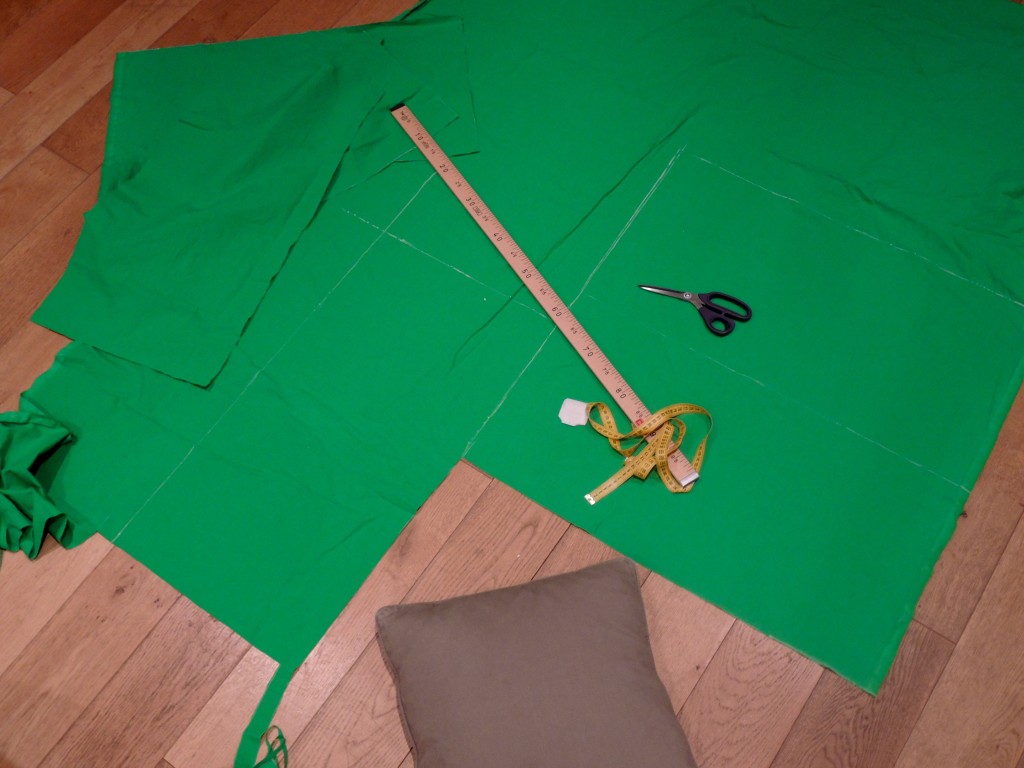
I still needed to get the right green tissue for the bags… After checking a couple of shops (which is not that easy around here as there are not a lot of shops selling fabrics and being to short notice for online delivery…) I finally found the right green tissue I had in mind at Mondial Tissue in Arlon and bought 4 meters of it. After washing and letting it dry, I had to display it on the floor for cutting out the 12 rectangles of 75 x 39 cm.
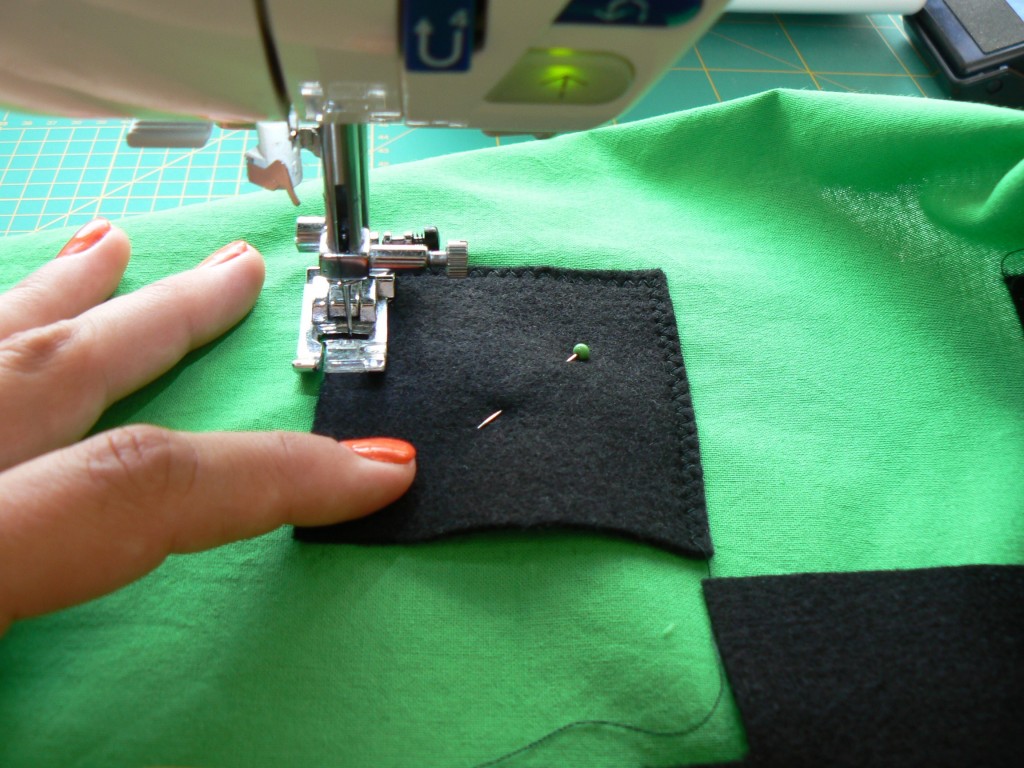
If you are also planning to sew some Creeper backpacks, you will first have to sew the tunnel for the cord. I made it around 3 cm high. In order to make the tissue more solid in the corners, I did iron a rectangle of vlieseline on it (fusible interlining which makes the tissue more stable for the eyelet). After this you can begin to prepare the Creepers face on one side of the bag, fix everything with needles before sewing it. A nice alternative could be to leave the upper part of the nose open, for a little hidden pocket to put i.e. some handkerchiefs or sweets in it…

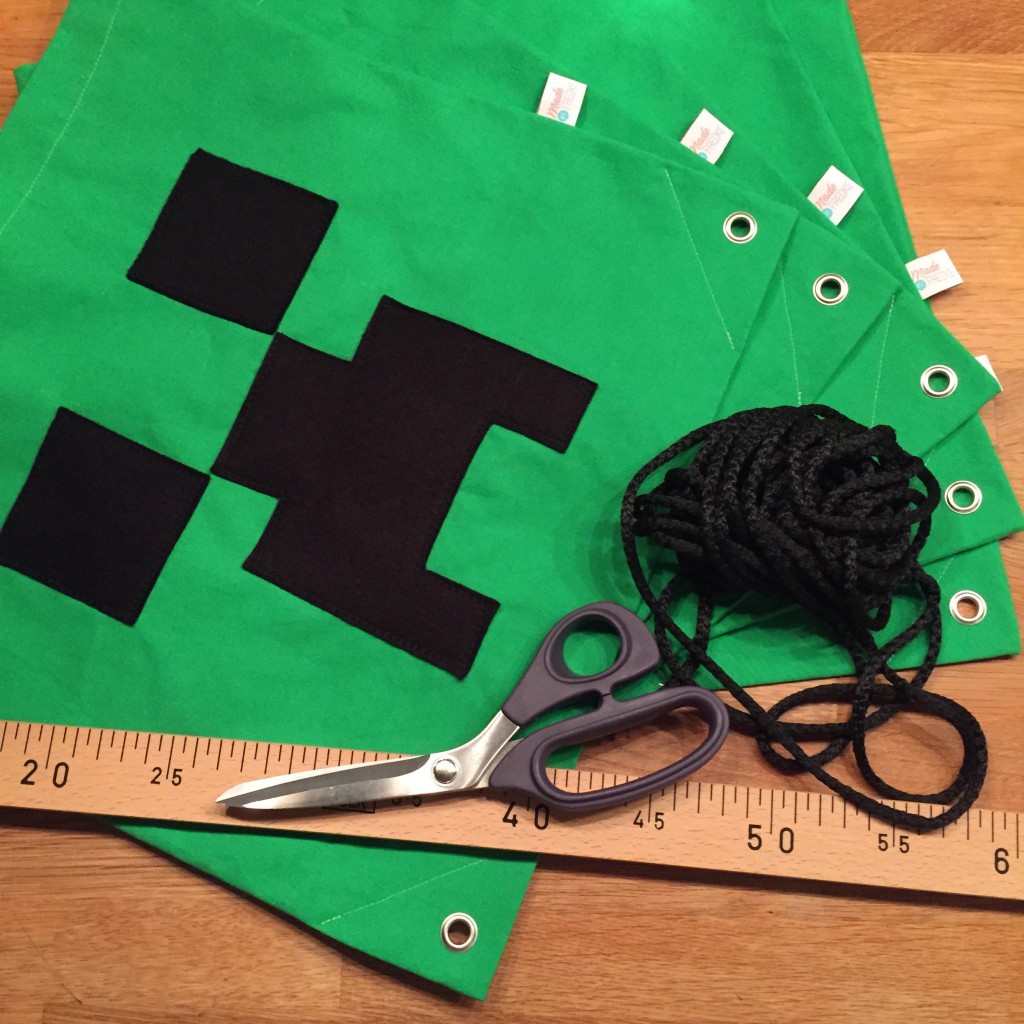
It’s time now to close the bag on both sides. Put the 2 good sides on one another and fix them with needles. I used my overlock but you can also use your normal sewing machine for this. Do not close the tunnel openings for the cord!! Turn everything upside down. I still sewed across the edges in order to fix the vlieseline part some more.
You still need to make one hole in each corner before placing the eyelet. Be aware that you always need 2 eyelets per bag… Now cut the cords in 2 x 2 meters and pass one part once through the whole tunnel and fix it with a big knot behind the eyelet. Repeat it with the other part!
And finished is your creeper backpack!
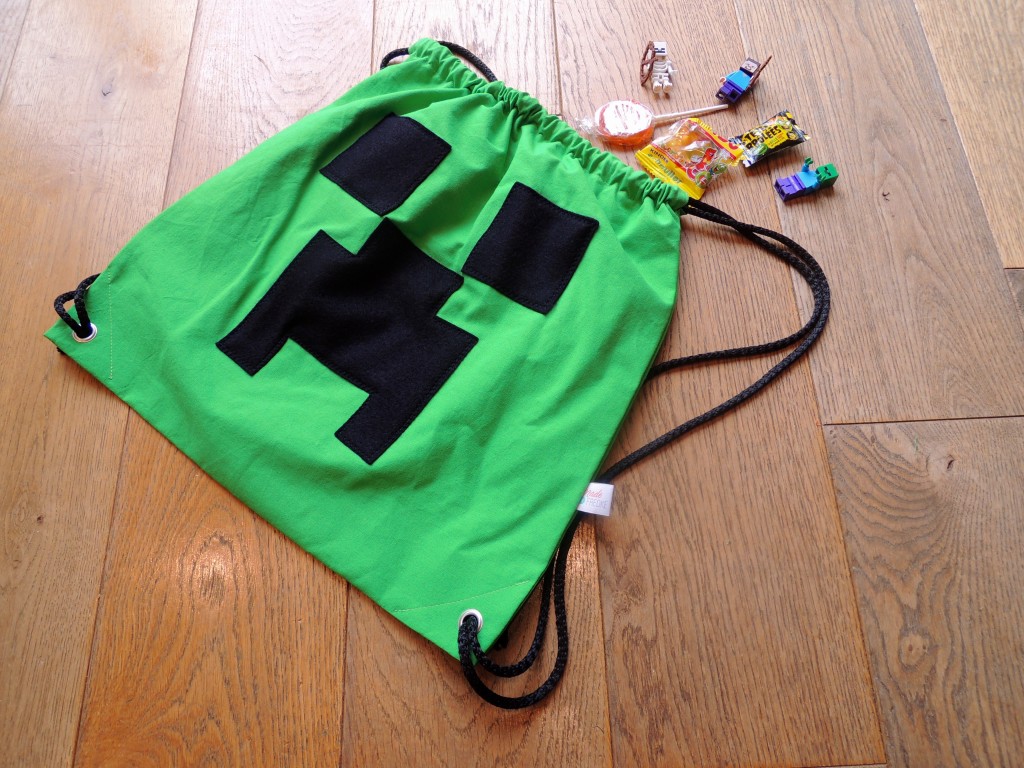
What I had more difficult to find are the 48 meters of cord in black and/or orange! Until now, I am still missing 4 meters for the backpack of our son… Hopefully his one will be finished for the beginning of school next September! And next time, I will be looking for something less time consuming for a goodie bag even if it was quite satisfactory to see the thrilled faces of the kids when Charel did hand out his Creeper goodie bags!

Fredke
I’m Frédérique, fortysomething, mum, maker and craft blogger with a penchant for chaos...